Blog

Checklist: Kitchen + Bathroom Walkthrough

Welcome back to another episode (post?) of things to look for when you’re walking through a potential new home. For a quick refresher, Andy is sharing his home walkthrough checklist that he uses when we walk new houses, which can be incredibly helpful if you’re in a competitive home buying market and a full home inspection could make or break your offer. If you missed our first post on this, would recommend checking it out first and then coming back here!

Today, Andy is sharing his lists for the kitchen, bathroom and attic. Potential red flags or damage in these areas is usually much easier to spot than others, but we’ve seen plenty of low-grade “renovations” that hide big problems behind cosmetic changes. This checklist will help you know what to spot, if it’s serious and what it could mean for your budget if you decide to make an offer.

Kitchen

  • Appliances: Check the age of every appliance. If any of them are seven years or older, they’re at risk of breaking at any time, so budget for a replacement. You could also ask the seller to provide a home warranty to cover the cost for replacements if it’s really dire. 
  • Water Damage: Check under the sink cabinet for any leaks or water damage to the cabinet. Some  flooring is more prone to water damage such as hardwood. Look around the sink, the water dispenser by the refrigerator, or the end of cabinets where water could have splashed up against the sides. 

Bathrooms

  • Mold: Don’t get too scared about surface level mold. It’s never great, but some elbow grease and bleach will take care of it. However, cracked caulking and mold together can be signs that the current owners are not maintaining the bathroom and water could be getting behind the walls and causing more serious damage. 
  • Water Damage: Look under the sink. If a past homeowner has done some sub-par DIY work, it usually surfaces with the plumbing under the sink. Check the bottom of the cabinet for water damage and if the pipes look funky, chances are they are and it’s a red flag. 
  • Pipes Under the Sink: Identify whether the pipes under the sink are copper, CPVC or PEX. Copper is typically in older homes and they can form pinhole leaks over time, although you can keep them if they’re in good condition. PEX had a few bad years with faulty products, but newer pipes are top of the line, so if you’re concerned, ask when they were most recently changed. CPVC is usually the safest and best bet, as long as they look to be in good condition.

Attic

  • Roof: Chances are you won’t be going up during an open house, but it’s good to look at the underside of the roof for signs of water damage or mold to give you an idea on the roof condition. If you see extensive damage to the roof on the inside of the attic or outside the house, you might be able to work a new roof into the deal from the seller. 
  • Trusses: Look for any trusses that might not be straight or are cracking as these are a structural concern and worth talking to an engineer about before making an offer.  
  • Insulation: Check that there is insulation in the attic and that it is more or less evenly distributed. If it’s not, it could affect energy efficiency and comfort. It’s not that expensive to fix if you need to, but worth noting if you aren’t having a formal home inspection and not in a crazy seller’s market.

Check back soon for our final checklist of the group: the basement! What are your walkthrough stories? Anything you caught or didn’t catch that impacted your home buying experience?

DIY: Outdoor Wooden Benches

Now that it’s sit outside weather (minus these pesky cicadas along the East Coast!), it’s the perfect time to build your outdoor oasis! Moving to a new home with a backyard opened our eyes to how expensive durable outdoor furniture can be, so Andy took it upon himself to build us some wooden benches for outdoor entertaining and relaxing. 

Interested in making some of your own? Here’s his steps for building our benches that you can replicate in your own backyard. 

  1. Start with your measurements. Determine how big your space is, how many benches you want and how you want them laid out. We went with one long and one short to maximize our space and materials. We had space for two benches to take up about 8 feet and 4 feet respectively in length. We also knew that we didn’t want to make custom cushions, so we based the width off of a standard cushion size we found online. The ones we liked came in 4 foot sections and the wood comes in 8 foot sections. Perfect!
  1. Position + cut wood to measurements. The seating area of the longer bench measured at eight feet using four pieces of wood for the seat and two for the back with no cutting. For the smaller bench, we cut the wood in half, using two pieces for the seat and one for the back. We used pressure treated 2×6’s for the seat and 2×10’s for the back. This gave us a seat depth of 18 inches to match the cushions and just under 20 inches for the back. For the back, test out some different angles on seats you have around your house, ours had about a 2” of tilt from the top of the back to the bottom.
  1. Build your armrests. For the sides, we used 4×6’s and long lag bolts to secure them together, turning the top on to the side to create an armrest. These are all 24 inches long, meaning that we could cut a 10 foot long one into 5 pieces to create each side with no waste. Put one 4×6 cut piece flat on the ground then another on its side above that. Use a drill bit to create two holes about half way through the 4×6 wide enough to drop the screw in. With a smaller drill bit than the bolt, drill a hole through the rest of the hole and slightly into the piece below it to make your screw go in easier. Then screw in your lag screw to join the two (we used these 6” exterior grade heavy duty screws). Now add the next piece sideways on top of it. Repeat the hole drilling process in slightly different spots front or back so that the next lag bolt doesn’t go into the hole meant for the other ones below. Repeat for the last piece and again for the other side piece. 
  1. Secure the armrests. Lay the built sides on the ground. Use two brackets for each piece of wood and, using exterior rated screws, secure them to the sides and make sure the ones for the seat are the same height down from the top of the arm rest. Now, using the same approach, secure four brackets for the back rest pieces making sure the other side mirrors. We also added a stack of 4×6’s 2 high  in the middle of the bench to reduce any sagging, we used 12 foot long 4×6’s instead of 10 foot so that there would be 2 2 foot sections leftover for this. If you choose to make a middle support, make sure it’s the same height from the underside of the 2×6 seats to the ground as is on the side supports.
  1. Assemble. Stand up your two sides (and set the middle support if you need one) and lay your first seat part across. A second hand will be useful for this part if you have a partner or a friend. With the top on laying on the brackets, go from underneath and use one inch screws to screw up through the bracket into the 2×6 seat. Any screw one and a half inches or longer will poke through the wood. You’ll want to leave a small gap between the seat pieces and back pieces to allow water to drain through.  Find a small piece of scrap or small tool to use as the spacer, I used a large screw driver for roughly ⅜” gap. Once all the pieces are secured, give it a go! If need be, you can always adjust and rescrew the brackets to make it more to your liking, depth, angle of the back, etc.
  1. Sand + Paint. An orbital sander will quickly clean up rough edges or round down the armrests. We used a deck paint on the benches so that it would stand up to elements and require minimal maintenance. Use a large paint brush, roller, or sprayer if you have it, for two or three coats.

Now throw on those cushions, crack open a beer, and enjoy your new favorite lounging spot!

Checklist: Exterior & Interior Home Walkthrough

There are several daunting tasks to complete when you’re a first time home buyer, but noticing potential problem spots while you’re walking a home can be one of the hardest if you don’t have a construction or home service background. A few of our friends just purchased new homes and Andy was always one of their first phone calls afterwards if they were concerned about a specific area. 

If it’s available to you, adding a formal home inspection to your offer is always a safe route to go, especially on your first home. As with any service, we highly recommend asking your realtor or looking for reviews online to find a trusted inspector. It’s an blind investment up front, but it’s better than a surprise investment later on after you’ve bought the home. 

In today’s real estate market though, a home inspection could make or break your offer, which is why we’ve created our list of key items to look for when you walk a home. This doesn’t replace a formal home inspection, but the idea is for you to notice issues that might require one if you’d like to move forward and help you plan any type of renovation budget later. 

There’s so many spaces to unpack in a home, so we’ll be sharing a few rooms a week to help you build a full list, starting with the exterior and a few interior items to look for throughout the entire home. 

Exterior

  • Roof shingles: Any shingles missing, lifting up, or looking patchy? This could indicate past damage and if it looks bad, it probably is. Ask your realtor when the roof was last replaced – they should have it as part of the information provided about the home. Roofs need to be replaced every 25-30 years, so if you’re nearing that timeline on the home, it should be factored into your budget. 
  • Rotted trim + paint + siding: On face value, this shows a lack of overall maintenance and if the previous owner didn’t take care of the outside, there’s no telling what’s been ignored on the inside. Also, depending on the extent of the rot, water damage could also indicate improper water management with gutter leaks, standing water, etc.
  • Cracked brick: Check for major cracks in the brick or siding of the home. Single or small cracked bricks aren’t too worrisome, but if you can follow a crack a couple of feet or you see a large one near a window, there might be a serious structural concern. Structural concern = expensive. 
  • Windows: Have they been updated or kept in good condition, or do they need some love? New windows are VERY expensive, so be prepared to replace them if needed. If the glass is double-pained, check to see if it has dirt or water in between the cracks, which could indicate a seal failure. Also, this seems logical but make sure you can open them! 
  • Grade: Make sure that the ground slopes away from the house. Any pooling water against the foundation can cause issues with the foundation. 
  • Signs of pest damage: Holes, channels, “rotting” or soft wood can all be signs that the home has more than human occupants. Termites can be bad news so if you see any of the signs we mentioned above, you’ll definitely want a pest inspection to find out more. You don’t want to discover that bats or a raccoon live in your attic on the first night sleeping there and you don’t want to put off the expense of termite damage for later. You also don’t have to bring a full on home inspector into the mix if this is your only concern too, which is helpful when you’re making an offer or being budget conscious!

Interior

  • Drywall cracking: Monitor for drywall cracks, anything large enough that you could stick a coin through. Small ones are normal in every house after settlement and small movements overtime. Large cracks or any that can be seen in the same area on multiple floors can signify a larger issue.
  • Uneven floors: As you walk, feel for any unevenness in the floor. It’s not always a serious issue, but worth getting a second opinion on to make sure it’s not a larger settlement issue. 
  • Leaks: Keep an eye out for leaks in the ceiling, walls, around baseboards, etc. A shady seller might also try to cover these up with paint, so pay attention to any fresh paint in random areas around the home.
  • Smoke & carbon monoxide detectors: Make sure these monitors are visible and readily available throughout the home. They’re required by building codes now, but some older homes might have skated by. It’s always a good idea to have a smoke detector in each bedroom, one on each floor in the hallway or main area, and at least one carbon monoxide detector in the house, usually on any bedroom level.

What were some of the things that you noticed during a home walkthrough? Did you buy the house or move on? We’d love to hear your stories! Stay tuned next week for our kitchen + bathroom checklists. 

Sourcing Budget-Friendly Materials for DIY Projects

Are you someone who always chooses the most expensive option when you’re shopping? Us too! Somehow the most expensive and unattainable is always the one that jumps out on the page or in the store. While it means you probably have great taste, it makes budgeting on materials for new projects really challenging. 

There are certainly some moments where spending the money is worth it, especially if it’s an appliance or new technology, but there’s plenty of  home decor or finished that can be achieved for a fraction of the cost. A $300,000 house doesn’t need to have one million dollar finishes, but you can make it look that way. It’s the exciting thing about trying to live a more DIY and sustainable lifestyle! 

If this is your first time updating or upgrading something in your home, it can be a little hard to figure out where to start. Find some inspiration for what you’d like your finished product to look like – whether that’s on Pinterest, in a magazine, or in a store. Getting the vision down is critical because it will guide your work to the end result. From there, research how to execute – whether that’s sanding, painting, reupholstering, or upgrading a specific part of the fixture. Each project will be different, so there’s less of a one-size fits all approach here. Find one thing that you want to begin with and experiment from there. 

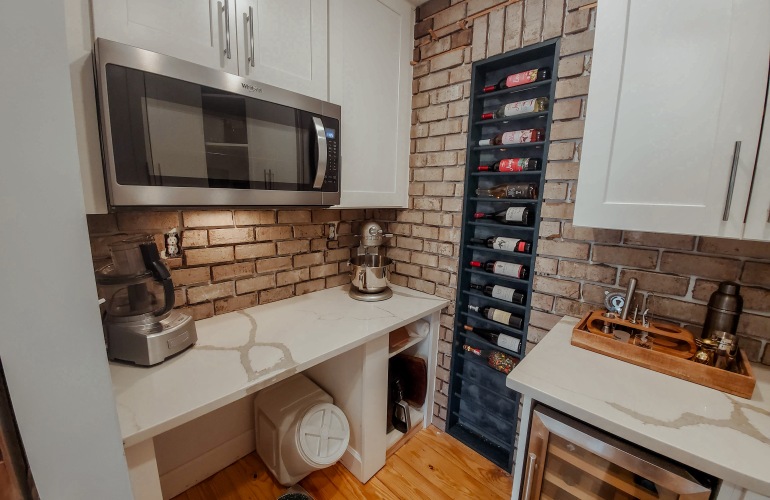
Our butler’s pantry in our new home!

We love interior brick and it’s been featured as a built-in bookshelf at our old house and as a feature wall in our new home. We upcycled brick on both projects, digging through piles of unusable and broken bricks on a local job site to find ones that were only slightly chipped or overlooked, and saving them from ending up in another landfill. You may not have as much as construction in your community as we do, but a poke around some salvage yards and antique stores could also be just as effective in finding new old materials of many shapes and sizes. If you also love brick and can’t find something you love, home improvement stores also sell embossed panels that are 4’x8’ and can be painted to look like real brick!

Another DIY-focused project in our home that we love is our gas fire pit. The top is a concrete block that Andy hand poured in the backyard (more on that process later!) and the surround eventually needed to be covered to hide the gas tank and supports below. We could have continued to work with concrete, but it would have required additional labor and cost. After looking around our local home improvement store, we found some metal roofing for only about $20 per sheet and reduced what our costs would have been if we used stacked stone or concrete. It also reduced time spent on the project, which freed up opportunities to work on other rooms around the house. Is it the same upscale finish or quality that concrete or stacked stone would have offered? No, but it was a creative way to get to our end result and we love to add stickers from our favorite breweries to the metal. 

When you’re working on a tight budget, it’s important to bring a bit of creativity into each project and sourcing your own materials is a great way to keep costs low. Search for old items that have potential to be upcycled into something new – even if it’s just one piece of it – or think about how an affordable material can help achieve your vision without breaking the bank. The most important thing to do is just jump in and start attempting to create. It’s okay if you don’t succeed the first time – enjoy the experience of trying to make something of your own. After all, that expensive piece that you were looking at in the first place will probably still be there waiting for you if you need it! 

Managing House Hunting Stress & Anxiety

Every new step in life brings its own set of stress and anxiety – and the home buying, selling and renovating process is no exception. Even in our mid-20’s, we’ve definitely grown a few extra gray hairs over the past year selling our old place, buying a new one and immediately jumping into renovations. There’s always stress when money is involved and there’s no escaping that anxiety of hoping everything falls into place the way you hope it does.

One upside to this is that you’re not alone! There are plenty of other people who are or have been in the same position that can help you along the way and that always always helps. 

While we were the first of our close friends to purchase a home, our parents were a helpful resource when it came to asking our realtor questions we hadn’t thought about or preparing for potential scenarios that could arise while we planned a sale and purchase at the same time. On the renovation side, we’re fortunate to have Andy’s experience, but that doesn’t mean we haven’t been stressed about material timelines or potential disasters we could find under the floor or behind the wall. 

We had no idea how much beautiful outdoor scenes would play a role into our house search in the future. We love being so close to trails and wildlife preservations.

Managing stress is incredibly important in this process, so here are a few things that have helped us manage ours during our buy/sell process and every major home renovation we undergo:

  1. Break Your To-Do List Into Smaller Tasks

We’re to-do list people and if you aren’t, this is probably a good time to start! There can be a lot to juggle simultaneously while you’re buying, selling, or starting a new home project and it’s helpful to have somewhere to keep track of it all so you don’t miss anything. Some steps are going to seem small, like calling to schedule inspections on a new or existing home, and others steps are going to be big, like tiling an entire shower. It’s helpful to break them up into even smaller tasks when possible to show yourself  momentum and stay motivated as you check things off. 

  1. Lean On Your Community 

When you’re embarking on a new buying/selling or home renovation journey, it’s important to have smart and supportive people in your corner to help you when you need it. A smart, reliable local realtor will be your biggest asset with a new buy or sell because they can help manage anxiety by guiding you through the process and anticipating your needs. With a home renovation project, it’s always a good idea to have a contractor or handy-person in your contacts to ask quick questions or swoop in if you need a last minute assist. Both of these individuals can provide you with practical, helpful advice that can help with feelings of anxiety. Talk to your friends and family too — your regular support system — within reason! We all have those friends and family members that love to provide unsolicited advice, and while we all know they mean well, it’s important to tell them when you just need a sounding board or when you don’t need advice so you can focus on what you want. 

  1. Know When to Take a Break

It may seem like taking a break from shopping for a home in an aggressive market or a big renovation project isn’t a good idea – and there are certain moments where a pause isn’t a good idea, especially if it means you’re losing money. But taking a step back can be a valuable moment to get a better perspective on a situation and squash persistent feelings of stress and anxiety. You might see a challenging step in a project more clearly or make a new assessment on your wish list for your next home – time away can help you reset and decide what’s important to you. A break also doesn’t have to be long! Enjoy a nice day or afternoon outside with family or friends or take a weekend trip to step away. You’ll be surprised how diverting energy for even a few hours can be refreshing in the midst of a stressful moment. 

One last piece of advice — always keep the end goal in mind. I think you could say this about any major life moment or project, but we found it to be especially important here because the end goal is a new home or a new space that you get to enjoy everyday! In moments of major stress, like when we ripped up our entire kitchen and could barely use the microwave and fridge for a few weeks, it was important to take a moment to recognize why we were in this position and think about the dream kitchen that was on the other side. That vision helped us carry on while we could only use one outlet or have to keep blocking the entrance to the kitchen so the dog couldn’t get into an active work zone.  

But sometimes, even the end goal isn’t enough. If it’s getting to the point where the stress is more than the end product is worth, it may be time to reassess the situation you’re in and take a different path. Your mental health and motivation is critical in making these things possible, so it’s important to acknowledge when something isn’t working out and causing you too much stress. Take a break from the home search if you’re not finding what you want or call in a second opinion on a project that you wanted to do yourself. Taking a step back can be really helpful in managing stress and keeping you on track. 

Again, all of these projects can and will be stressful, but it’s all worth it in the end! When you take it step by step and lean on your support system to help, things are much more manageable.

The First Week in Your New Home

The first days in your new home are some of the most exciting times! All the work that you put into buying and potentially selling your last place has finally paid off – and the big part of the moving process is (hopefully!) over. Unpacking boxes and deciding where things will go can be overwhelming, but you really have all the time that you need to make your house a home – which for us is probably just before we decide to sell it! 

In addition to assembling the furniture so you’ll have a place to sleep and collapse in front of the TV after a long day of moving and unpacking, there’s a couple of other early, little-known steps you can take to truly make your house your own. We will warn you, they’re not the cutest things that will instantly make your house perfect and beautiful, but they’ll give you peace of mind as you settle in. 

  1. Change the Locks

The first and probably most obvious first step is to change all the locks in your new home. You don’t know who had a key from the previous owner and no one ever wants an expected visitor. This also includes reprogramming any garage codes or openers too. All items are easy to change with a simple call to a locksmith and can be taken care of immediately after closing. 

  1. Clean Everything and Change the Toilet Seats

Again, another well-known step, but it’s important to clean all surfaces before you move into a new home, even if they look like they’ve been recently cleaned already. The thought of a daily shower in a stranger’s bathroom isn’t appealing to anyone – so take the time to give everything at least a Clorox wipe down. Who doesn’t love the smell of a newly cleaned house anyways? Also – if you’re not planning on getting new toilets for a room renovation, buy yourself some new toilet seats. You don’t know how long they’ve been there and it’s something you’ll use everyday. They’re cheap and easy to replace with a screwdriver! 

  1. Change Air & Water Filters

One of the most important things – if not the most important – in your new home will be the cleanliness of the air you breathe and the water you drink. Change your air and water filters immediately upon moving into a new home, especially if it’s an older house. You won’t know the last time that they were changed and unless you personally watched the filters be changed prior to closing or move-in, it’s always a good idea to update them yourself so you can get on a schedule of when they need to be changed moving forward. If you want to take an extra step with the air filters or your new home has an old home smell, you can clean out your ducts to make sure that the air is as clean as possible. 

  1. Forward Your Mail

The last thing that you’ll want is to miss mail at your old address, so take the extra step of having things forwarded at the post office to your new one while you change over your address with your bank or other vendors. It’s also a good moment to delete any previous addresses from places you frequently order from, like Amazon, or food delivery. We’ve had our fair share of orders going to the wrong location in the past! 

  1. Watch for Leaks, Creaks, or Anything Out of the Ordinary

It’s likely that you received an inspection before moving into your new home that would have caught any major damage or problems. However, it’s important to remember that the inspection is just a snapshot of what living in your new house would be like. A sink might be able to show that it can run for two minutes, but may leak after cleaning up dinner. You’ll want to be on high alert for anything that could be wrong with the house over the first week, in case it’s a symptom of a larger problem. That being said, there will be noises that you’re not accustomed to, especially if you’re moving into an old house. You might not sleep well at the beginning because you hear everything and that’s okay. You’ll know when something isn’t right – even if it’s your first home. 

Most of these tips are practical knowledge that a good realtor or even close parent will tell you as you embark on your home buying journey. However, they’re not innate to everyone, and they’ve certainly helped us and our friends in their first weeks at their new homes. We had to be especially dedicated to cleaning when we bought our most recent home because of the pandemic and certainly plan to keep that level of cleanliness up in every new home we purchase. 

What are some of the first things that you’ve done in your new house? We’d love to hear your tips and tricks in the comments!

The Do’s and Don’ts of Planning New Landscaping

There’s nothing like a warm spring day, a cold glass of something you love, and dirt under your fingernails as the smell of fresh mulch and grass fills the air. You’re probably dirty, sweating and sunburnt (and if you’re not, we need some tips from YOU!), but finishing a big day in the yard will never not be satisfying. 

Landscaping is an easy way to create instant curb appeal for your home. It brings life and color to your community, greets you and your guests every time you’re outside and adds value for potential buyers in the future – especially when that means they only have to keep up your good work! 

Everyone has their own idea of what perfect landscaping looks like – whether it’s a full flower and plant garden, a lawn full of lush green grass or an intricate mix of landscaping and hardscaping – and maintenance, too. But, there are a few things that all landscaping projects will need to consider no matter what. 

  1. Get Some Spacial Awareness

The first thing to consider with landscaping is the amount of space in your yard. You have to think short and long term too – not only how plants fit now, but how they will fit 20 years from now as they continue to grow.  If you are putting plants around a balcony, you might not want a plant that will shoot up eight feet in a season and overtake any other plants. Likewise, you don’t want to plant a tree right next to a house that could grow in a few years to cast a shadow over your natural light, or whose roots will grow into the foundation causing water and structural damage. When you’re thinking about multiple plants at a time, you’ll want to layer the sizes so that once they grow in, everything is cohesive and visible. You’ll also want to think about the community where you’re planting. Is one of your patches of grass the ideal bathroom spot for neighborhood dogs? Do deer frequently have breakfast in front yard gardens? Will the neighborhood kids trample the area closest to the sidewalk? You’ll want to think smart about where you place high-value plants and flowers to keep them protected and beautiful all year long. 

  1. Take Sunlight, Water and Soil into Account

When you’re selecting plants for one or multiple parts of your yard, you’ll want to think about access to sunlight and water, in addition to the type of soil where you’re planting. We have a fairly shaded area with poor drainage off the side of our backyard, so we needed plants that could tolerate standing water after a lot of rain and only required a few hours of direct sunlight per day. Meanwhile, our front yard has a high spot that stays mostly dry and receives almost full sunlight. It’s important to get to know your yard a bit before you make landscaping plans so you can understand what will grow and thrive best. Watch how the sun moves across the house during the day and how your current yard reacts after some rain. If you want to better understand your soil quality too, home improvement stores have DIY tests that help you test the acidity and nutrient level and better understand how you’ll need to fertilize the soil in the long run. Once you’ve gathered some preliminary information, we highly recommend stopping in to your local nursery and sharing details about your yard with their staff so they can help you select some options that best fit your needs. 

  1. Build a Yard for All Seasons

Depending on your climate, you’ll also want to consider seasonality when you’re selecting new plants. If you want to see something new in your garden all year long (including the winter!), select a mix of plants that peak at different times of the year. Some plants will flower early in the year while others will be later; leaves may come in one color in spring and change in the fall; and during the winter, some may expose colorful branches and stems while others will still provide greenery. If you have the space, try to create a mix where one of the species hits peak color every two months. One thing to look out for – make sure that the plants you select aren’t invasive, aka won’t take over your entire garden in a few years. We’d also like to slide in a quick plug for our pollinator friends, make sure to throw in some native and pollinator friendly plants as well!

  1. Maintenance 

A critical consideration for any project – landscaping or otherwise – is how much maintenance it will take. A large lush garden sounds great in theory, but if you can’t put in the work, it will start to look a lot less great. From pruning with trimmers, hand snipping branches or seed pods, raking leaves, or cleaning up fallen fruit, every plant will require some maintenance whether it is once a year or weekly. Likewise, you’ll want to consider your ground cover. Mulch will need to be touched up once a year and weeded, grass cut and fertilized regularly, gravel cleaned out occasionally – even the lowest maintenance options need some care. If you are looking for plants that are well acclimated to your current climate and need less checking up on, you can source native plants from your local nursery or line. They don’t need fertilizer, they take less water and they restore natural habitats. We’d also recommend looking with any homeowners association requirements about how to maintain your landscaping. The last thing you want after all your hard work is a fine or a warming to remove something that doesn’t meet their guidelines. 

All of these considerations will play into your approach with landscaping design and hopefully meet some of your expectations for form and function. It may seem like a lot of work for little pay off, especially if you don’t spend a lot of time outside in your front yard or only have a small patch of land to work with, but it’s an added benefit to the exterior of your home that you can take pride in.

What are you planting this year? Any other tips that you would add to ours? We’d love to hear from you!

How to Refinish Old Barn Doors

Barn doors can be an easy first home DIY project for someone that’s new to renovating and wants to add an extra design feature to their home. Alexa isn’t an expert when it comes to cutting trim or replacing a faucet and she successfully embarked on this project one afternoon with a friend in the backyard! 

Even though they’ve come to be associated with farmhouse design styles (it is a barn door after all!), we love barn doors because they’re so versatile. They come in many different styles, they can be painted or stained almost any color you want and diversified with different types of fixtures. A barn door could fit into an Italian Tuscan style villa or a mid-century modern home or a rustic farmhouse – it’s all about what you make it. 

We knew that we wanted to have a barn door feature in our home and our butler’s pantry presented the perfect opportunity to create a fun visual feature in our kitchen, while also dividing the room when we had guests visiting. We bought our barn doors at our favorite local antique and salvage store, The Old Lucketts Store, in Lucketts, Virginia. It’s always great to shop local when you’re starting a DIY project because you can get your materials at a discount and support the local small business community.  

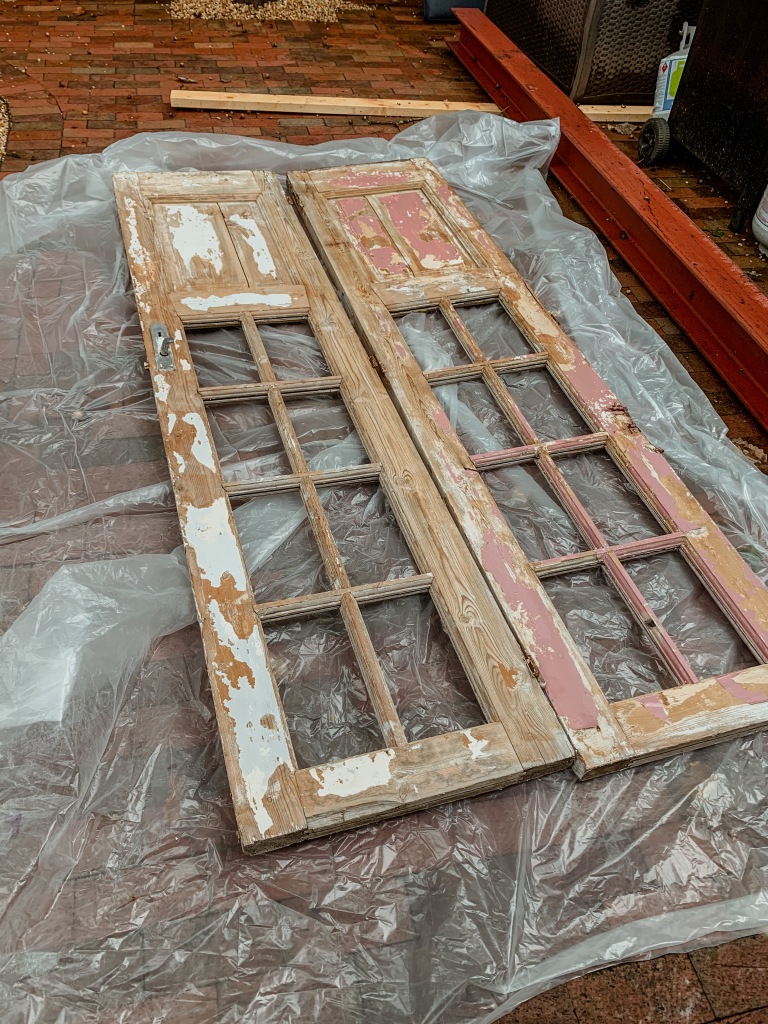
Before we started cutting and sanding down the doors. While the pink paint was amazing, we deduced that it was likely lead-based and wouldn’t be ideal to have flaking off on to our floor.
  1. Measure the size of the door & cut as needed

Before you buy the barn doors, it’s important to know what size you’re looking for and how you’ll get it there. It’s unlikely that you’ll find the perfect fit instantly, so we’d recommend purchasing a larger door than needed and using a circular saw to cut it down to size at home. Depending on where you buy it from, some retailers may have the tools on site to cut it for you. Know what elements of the door you want to keep, whether it’s more of the top or bottom or somewhere in between. 

The doors we purchased had been kept outside for a long time and the bottoms were starting to become one with the dirt in the ground, so we removed about 3 inches from the bottom and an inch from the top too to fit our opening. Be sure to look at the clearances and dimensions of your barn door hardware so you know what thickness the door can be, recommended over sizing based on the opening so that there aren’t gaps on the top or sides, and how it’ll need to be mounted to the wall.

  1. Sand down the doors to remove old paint, varnish and stain

Old doors have such a history behind them (pun intended?) and you’ll want to decide how much of it you’ll want to see come through in your project. Wire brushes, putty knives, or sanders can all provide varying styles of finish, or use a combination to dial in the look you are going for. We used a combination of all of them and an initial swipe with a power washer to knock off the flaking paint.

For sandpaper, 220 grit is a safe bet to start. We found that it strripped off just enough paint to dial in our desired look without digging in too much or taking too long. The higher the number, the smoother the sand paper, so if you have a lot of layers of paint that you want stripped off, you may be able to start with a rougher sandpaper to knock off the bulk of it.

Our doors had been painted pink at one point and we deduced that it was likely lead-based paint and needed to come off. While we sanded, we noticed the paint had left these white marks on the doors, which we decided to keep for added character. 

  1. Choose a paint, varnish or stain

After you’ve dusted off the remnants of the sanding process, you’re ready to style your doors as you want! There’s pros and cons to choosing a paint, stain or varnish for the doors, but ultimately it’s about what you’re looking for in design and ease of application. Paint will coat the doors in any color that you want. Stain will sink into the wood and bring out its natural color with darker tones. Varnish adds a protective layer to the wood without changing the color, just brightening up its natural tones with a coat of protective finish. Some brands offer a stain and varnish combo for color and protection. Use your own judgment on how many coats to add to the doors, but remember that a little goes a long way! Make sure you read the back of the container for proper application and curing times. Some products give off fumes for days while the product cures, so be prepared to use a well ventilated and dry space as needed.

We used Restor-A-Finish in Golden Oak. 

  1. Finish with fixtures

In addition to the color, the character of the doors can really come out in the finishes you add, like handles, hinges, or barn door hardware and all work in tandem. We opted to not use handles because we wanted bypass barn doors and a handle would keep them from passing in front of each other. Keep in mind that hardware can become a statement piece on its own, so make sure that it compliments your door and space accordingly.

Once you’ve chosen your fixtures, take some time with the drill to install and voila! You have new barn doors that add some character to your home! 

Our finished product. Not too shabby!

Do you like the barn door style? Share a photo of ones you have in your house or absolutely love.  

How to House Hunt in an Ultra-Competitive Market

House hunting during the peak spring market is kind of like the crazy chaos you’d imagine in stores on Black Friday or with the release of a new Apple product. There’s a heightened sense of anxiety in securing an appointment at a home with multiple showings, coupled with a fear of who else might want your dream home and what offer they’re putting in to try to beat yours. It’s basically a competition; you want to win and you want the discomfort of the situation to end as quickly as possible. 

While there will always be anxiety around buying and selling a home, or any major purchase for that matter, but there’s a few things that you can do to prepare yourself to manage the stress of house hunting and get the outcome that you want. 

It starts by developing that comprehensive budget, location and wish list that we discussed in our last home buying post (and if you haven’t read that yet, would recommend starting there first). This list will help you narrow your search to homes that best meet your criteria and set you up for success before you even go to a showing. 

Here’s a few other tips we have for finding homes in a competitive market:

  1. Check listings early and often

When you sign with a realtor, you’ll gain access to your local multiple listing service (MLS), where your realtor will flag potential listings that fit your criteria. It’s important to check MLS and Zillow/Redfin/etc. daily while you’re searching for a home to keep pace with other buyers. It’s hard to predict what a seller is looking for in a buyer and consistently checking new listings will ensure you’re seeing potential properties as early as possible. A common tactic is putting new listings on MLS as “coming soon” on Tuesdays and active on Thursdays to drum up interest for the coming weekend. If daily searching is too big of a commitment, checking in on Tuesdays and Thursdays will get you the most benefit for your time. 

  1. Be flexible

On top of the looming financial commitment, house hunting is a major time commitment. You have to be willing to sacrifice entire weekends or your hard earned paid time off to see homes at a moment’s notice. You also need a realtor who has a similar mindset – if they aren’t replying to your interest in seeing a home the same or next day, they might not be the best person to help you navigate the process. A typical weekend morning for us during our house hunt was checking MLS, calling our realtor to schedule an appointment and out the door with coffee in hand all within 45 minutes. You have to be vigilant and consistent to get the best results. 

  1. Be prepared to make an offer at (almost) any point

In any market, it can be hard to determine what a seller is looking for in a buyer, whether they just want to sell the home for the sticker price and get out or if they want to see how much they can get through a bidding war or by asking potential buyers to remove contingencies from their offer. A good realtor can help you try to figure out a seller’s motives, but both scenarios require a quick, competitive offer. This is where your list comes in handy again – if the property checked your most important boxes, you can be prepared to make a decision faster and smarter. Similarly to your realtor, your lender (if you have one) should also be prepared to help you prepare an offer on relatively short notice. They can work together to ensure that your offer gets in during the seller’s timeline and delivers your best chance at being approved. 

At every stage in the process, it’s always incredibly important to ask your realtor a lot of questions. In a competitive market, you have to be ready to make an offer within hours of seeing a home and you need to treat almost every showing as if you could be seeing your future home. Ask their opinion on any potential major expenses, like a foundation crack or issue with the roof, that you might be able to mention in an offer or potential renovation considerations for future investment as you might want to go with a lower down payment to leave cash leftover for the project. Get a feel for the neighborhood if you’re not familiar with the area and understand the local HOA and community amenities too. Minor details like this will become major to you if you decide to purchase the home. 

We wish we could tell you there was an easy fix to anxiety around buying a new home, but as with most things, the only thing you can do to manage it is try to be as prepared and informed as possible. Although, take solace in the fact that you’re not alone and that it’s still an exciting time when you’re looking for a new home, even if it comes with some discomfort. 

What was your most memorable home walk through experience? We’d love to hear about it and compare stories!

Designing a Space Before a Renovation

When we start thinking about how to plan a new space or project in our home, there are plenty of nights where Andy will wake up with a new idea or source of inspiration. It sounds ridiculous (and sometimes it is!), but renovations projects tend to be all consuming when you’re excited and ready to break ground. 

There’s several preparatory steps to take when you’re planning a new project and some of them are actually the more fun part of the whole thing – aside from the finished product. It’s the time where you lay out all your ideas and bring them together, building one cohesive idea. You’ll pick up new things along the way too, whether you’re watching a home renovation show or find a new brand whose home pieces you love. Updating and adding is always a part of the fun! 

You can begin the design process in any number of ways. For us, we always brought a tape measure when we walked new potential properties and came up with ideas as we went to see if there was a way to improve the space, usually focusing around the owner’s suite and kitchen. If you’re newer to home renovating, it may be that you’re starting with a space that you already have and you want to make functional changes to one or a few rooms. 

Our kitchen mid-demo – the vision was coming together, but a lot of space planning took place before this!

Wherever you’re starting, here’s a few preliminary steps that everyone will need to take before beginning a new home project: 

  1. Assess What You Have & What You Want

It’s always important to start your project with what you already have and a vision for what you want. You might have a living room couch that needs to orient a certain way in the room or a owner’s bathroom that doesn’t quite fit your vision. Make a list within each room of what you want to keep and change, using potential renovation as a solution for getting both. By looking at your must-have’s alongside your current options, you’ll be able to understand what’s feasible and temper expectations if you’re not able to check everything off your list. It’s a good time to consider the form of your design v. the function of the room. Do you want to move the TV to a different wall but are concerned about light coming in from the windows? Does your dream couch not fit with the coffee table that you already have? These are the questions to ask yourself as you assess what you have and what you want and get yourself as close to your vision as possible, but still liveable. 

  1. Find a Source of Inspiration

Whether you’re working with a contractor, designer or just on your own, you’ll want to seek out sources of inspiration to guide your renovation projects. They help you keep an end goal in mind and with any designing or decorating in the future. Start a Pinterest board or follow home design accounts on Instagram to see what brands and styles they like. Walk around Target or Home Depot to see what fixtures or decor items are within your price point. looking at light fixtures. Visit your local antique store or salvage shop for parts and pieces to use throughout the space. If you’re a visual person, it can also help to draw out a couple of different ideas of how you might want the room to look, even if it’s not to scale. You’ll use this inspiration to guide the next steps and that’s critical, even if it comes out looking completely different. 

  1. Determine What You Can Feasibly Execute 

Unless you’re an experienced contractor, it’s highly unlikely that you’ll be able to execute a big renovation project on your own. You may need to call in a plumber or electrician to handle some of the areas that require more trade experience, or you may need assistance on like 80 percent of the project. Outline what these needs are early so you can start gathering estimates and gain a better understanding of your budget and material needs for the process. From there, start researching how to accomplish the tasks that you’ll be taking on yourself and understand the steps and tools you’ll need to complete it. 

  1. Create a Tentative Timeline

Once you have an outline of what you’ll be accomplishing and how, you can start putting together a rough timeline for the project. It’s important to go from beginning to end, understanding what needs to be accomplished in order to take the next step. You will likely need to empty and demolish an entire room before your electrician and/or plumber come to expose everything, slotting in your other tasks alongside their work or to follow. The biggest tip we have is to account for more time than you originally estimate. It’s hard to know what issues could pop up in the middle of the renovation, so temper expectations on how long something could take at the start. It’s better to be pleasantly surprised with finishing early or on time than late. 

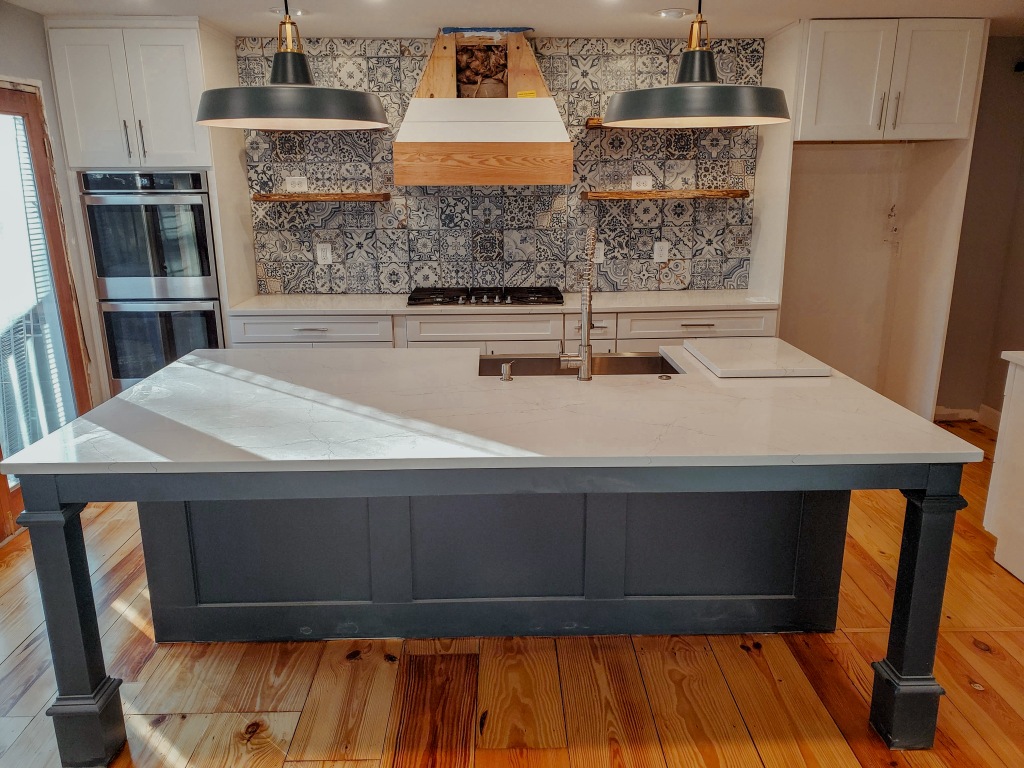
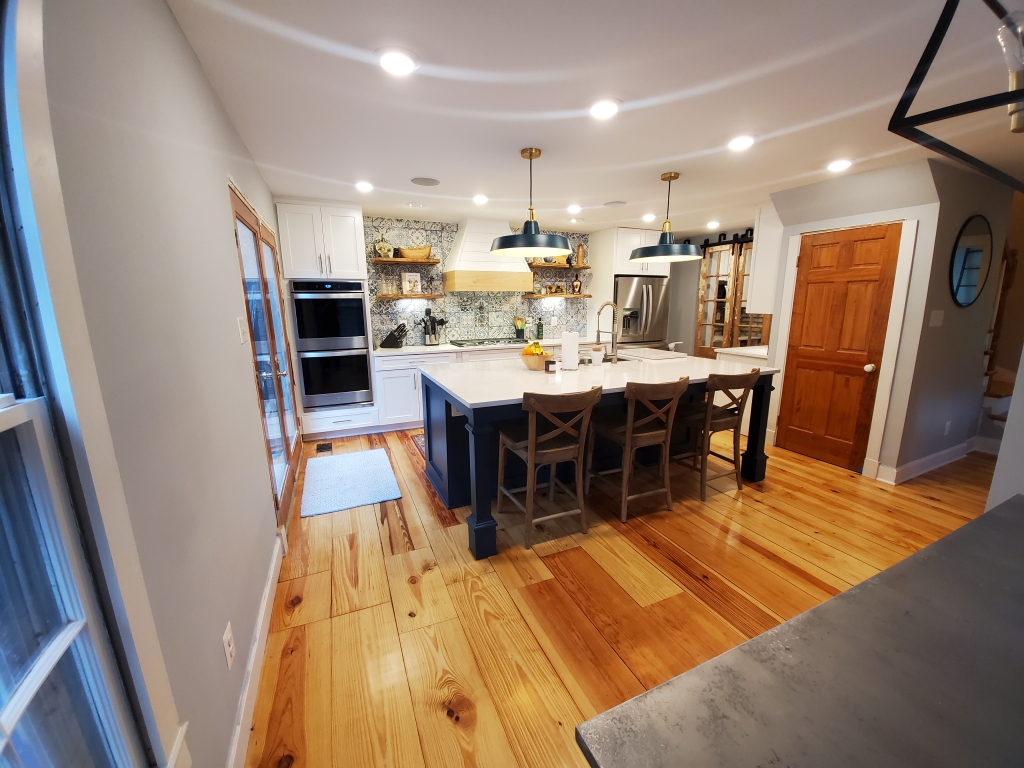
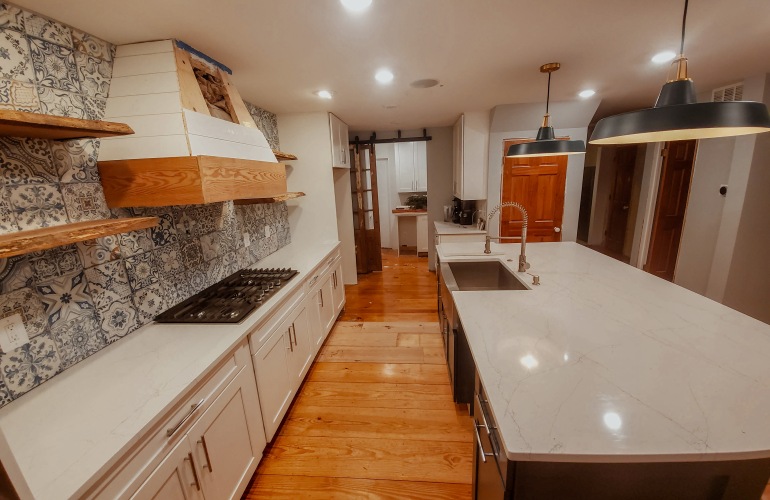
And today – our kitchen all beautiful and finished!

These steps were crucial for us recently when we laid out our plans for renovating our living room. We wanted a space that felt cozy and homey after a long day, while still inviting for friends and family when they come over on the weekends. The room is spacious, but vertically long and, to make our vision possible, we essentially turned how we live in the room 45 degrees to create a beautiful, custom built-in entertainment center with shelves on either side of the TV. At the same time, we had to make sure that our new seating orientation didn’t block the one entrance to the room, which is on the opposite side of the room to the entertainment center. 

It may sound like silly little details – and sometimes they are – but every decision you make in the room alters potential options for other parts in the room. Don’t expect your first project or room to draw itself the  first time. Refine your vision over and over again and you’ll eventually get to the space that you want. We found it helpful to anchor around a few key things – built-in shelves / entertainment center and a brand new custom couch. Now that we’ve made those two decisions, everything else can fall into place around them. 

What are some of the must-have’s that you’re looking for in your house right now? We’d love to hear from you!