
Barn doors can be an easy first home DIY project for someone that’s new to renovating and wants to add an extra design feature to their home. Alexa isn’t an expert when it comes to cutting trim or replacing a faucet and she successfully embarked on this project one afternoon with a friend in the backyard!
Even though they’ve come to be associated with farmhouse design styles (it is a barn door after all!), we love barn doors because they’re so versatile. They come in many different styles, they can be painted or stained almost any color you want and diversified with different types of fixtures. A barn door could fit into an Italian Tuscan style villa or a mid-century modern home or a rustic farmhouse – it’s all about what you make it.
We knew that we wanted to have a barn door feature in our home and our butler’s pantry presented the perfect opportunity to create a fun visual feature in our kitchen, while also dividing the room when we had guests visiting. We bought our barn doors at our favorite local antique and salvage store, The Old Lucketts Store, in Lucketts, Virginia. It’s always great to shop local when you’re starting a DIY project because you can get your materials at a discount and support the local small business community.
- Measure the size of the door & cut as needed
Before you buy the barn doors, it’s important to know what size you’re looking for and how you’ll get it there. It’s unlikely that you’ll find the perfect fit instantly, so we’d recommend purchasing a larger door than needed and using a circular saw to cut it down to size at home. Depending on where you buy it from, some retailers may have the tools on site to cut it for you. Know what elements of the door you want to keep, whether it’s more of the top or bottom or somewhere in between.
The doors we purchased had been kept outside for a long time and the bottoms were starting to become one with the dirt in the ground, so we removed about 3 inches from the bottom and an inch from the top too to fit our opening. Be sure to look at the clearances and dimensions of your barn door hardware so you know what thickness the door can be, recommended over sizing based on the opening so that there aren’t gaps on the top or sides, and how it’ll need to be mounted to the wall.
- Sand down the doors to remove old paint, varnish and stain
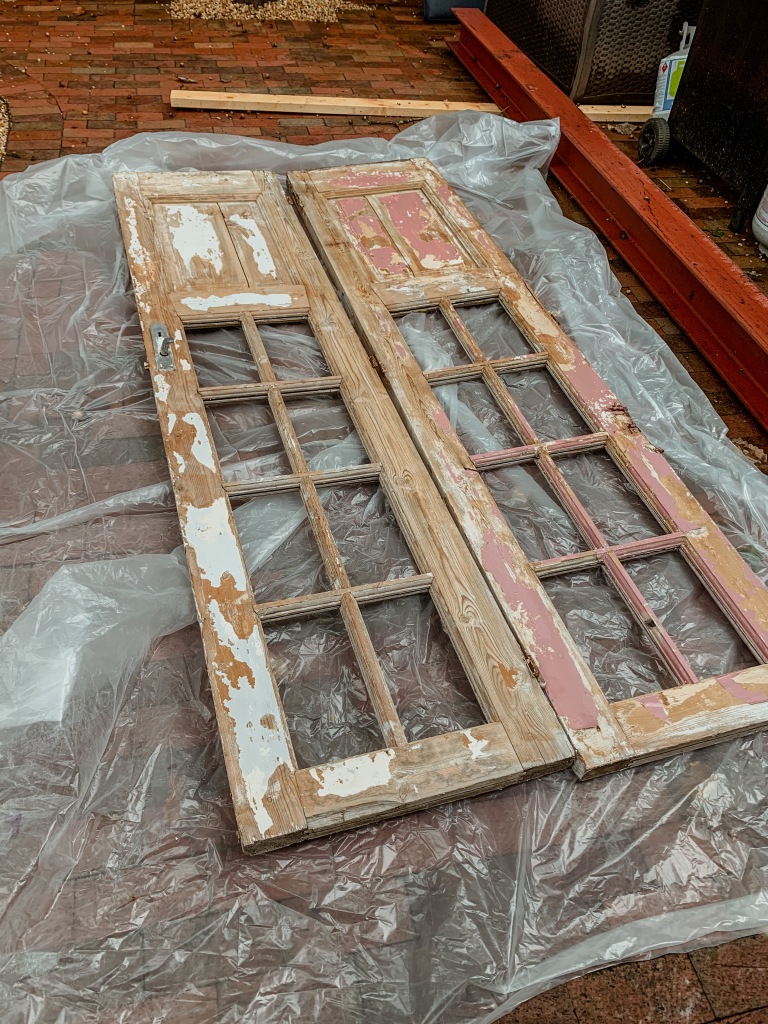
Old doors have such a history behind them (pun intended?) and you’ll want to decide how much of it you’ll want to see come through in your project. Wire brushes, putty knives, or sanders can all provide varying styles of finish, or use a combination to dial in the look you are going for. We used a combination of all of them and an initial swipe with a power washer to knock off the flaking paint.
For sandpaper, 220 grit is a safe bet to start. We found that it strripped off just enough paint to dial in our desired look without digging in too much or taking too long. The higher the number, the smoother the sand paper, so if you have a lot of layers of paint that you want stripped off, you may be able to start with a rougher sandpaper to knock off the bulk of it.
Our doors had been painted pink at one point and we deduced that it was likely lead-based paint and needed to come off. While we sanded, we noticed the paint had left these white marks on the doors, which we decided to keep for added character.
- Choose a paint, varnish or stain
After you’ve dusted off the remnants of the sanding process, you’re ready to style your doors as you want! There’s pros and cons to choosing a paint, stain or varnish for the doors, but ultimately it’s about what you’re looking for in design and ease of application. Paint will coat the doors in any color that you want. Stain will sink into the wood and bring out its natural color with darker tones. Varnish adds a protective layer to the wood without changing the color, just brightening up its natural tones with a coat of protective finish. Some brands offer a stain and varnish combo for color and protection. Use your own judgment on how many coats to add to the doors, but remember that a little goes a long way! Make sure you read the back of the container for proper application and curing times. Some products give off fumes for days while the product cures, so be prepared to use a well ventilated and dry space as needed.
We used Restor-A-Finish in Golden Oak.
- Finish with fixtures
In addition to the color, the character of the doors can really come out in the finishes you add, like handles, hinges, or barn door hardware and all work in tandem. We opted to not use handles because we wanted bypass barn doors and a handle would keep them from passing in front of each other. Keep in mind that hardware can become a statement piece on its own, so make sure that it compliments your door and space accordingly.
Once you’ve chosen your fixtures, take some time with the drill to install and voila! You have new barn doors that add some character to your home!

Do you like the barn door style? Share a photo of ones you have in your house or absolutely love.
