Blog

Finding the Right Realtor & Lender for Home Buying

There’s no avoiding the stress and anxiety that comes along with buying a new home. It can become more manageable over time, but there’s always opportunities for unprecedented circumstances to pop up – like a revealing inspection or a sudden change in financial status or a global pandemic. It’s hard to keep things picture perfect from when your offer is accepted to when you sign at closing, as much as you might want to. 

To add another layer for new homebuyers, online-based real estate apps can push specific agents and lenders to make the process appear too easy and seamless.  Don’t get us wrong, Zillow, Redfin and other apps are powerful tools in your arsenal, but booking a showing through an app or relying solely on the app’s metrics for comps will give you an unrealistic view of the process. A relator’s institutional knowledge about the housing market and the area where you live is invaluable when you’re walking a house and they have better tools at their disposal to share comps and help you make a strong offer. The same goes for an online lending app. They might give you a good idea of your price point, but the ones with looser terms and lackluster backgrounds might be the reason why your offer isn’t picked over another. 

Relying on apps might be the cheaper option, but you’re buying a house. If you thought it would be cheap to do it right, you’re probably making the wrong investment decision. 

Penny needs just the right spot for lounging in the backyard!

For all of these reasons, and many more, it’s incredibly important to find a realtor and a lender who can support you through your home buying experience and make it smooth as possible. They will be the ones fielding your phone calls when you want to make a showing appointment at 8 a.m. and an offer at 1 p.m. on a Saturday – and then negotiate through late Sunday night. You have to develop a sense of trust and constant lines of communication. 

The best way to begin your search for a realtor and lender is through your own network. Have any family, friends or colleagues in your area recently purchased a home? Ask them about their experience with their realtor and lender and see if they have any recommendations for a specific agent or company. A mutual connection is a great way to build a relationship – and how a lot of these agents like to do business! 

It’s completely appropriate to interview your realtor and lender prior to choosing to work with them, whether they’ve come recommended by a friend or not. Here’s a few traits you’ll want to look for:

  1. Strong Local Experience

Every city, town, and even neighborhood has its own nuances and your realtor should have experience with the areas where you’re searching to help you find the best option for the best price. Your dream neighborhood might have an expensive and restrictive homeowners association or have planned construction in the coming months that will make a quiet space much louder and busier. Your realtor needs experience to know what will best suit your wants and needs as a buyer. If they’re locally based, they’ll also likely have strong insight into competing offers and might even know the listing agent or one of their colleagues, which can help you get a leg up in the process or maybe alert you that you shouldn’t make an offer on a home if they don’t have a good reputation. Similarly, having a lender with a strong local reputation can make your offer more attractive to a seller and their listing agent because they’ll likely be familiar with their company. 

  1. Diligent + Timely Communication

Communication is key to having a good relationship with your realtor and lender. You will likely be exchanging more texts, calls, and emails with these two throughout the process than with your friends and family. In an aggressive market, there will be days where you need your realtor to show up at 8 a.m. on a Saturday to see a house that only popped up the day before. You’ll want to put in an offer a few hours later and your lender will need to be on standby to crunch the numbers with an updated cost breakdown so you know what to include in your offer package. Communication also shows commitment – to you, your home buying process and to their own pay day. 

  1. Willing to Educate 

As we both bought our first houses, the education component that our realtor and lender brought to the table was invaluable. There’s too many terms, tactics and potential outcomes throughout the process to go it on your own, so finding someone that can patiently educate you throughout the process is important. Not only will it help you become a more educated homebuyer, but it again shows their commitment to the process and your potential referrals for your network. 

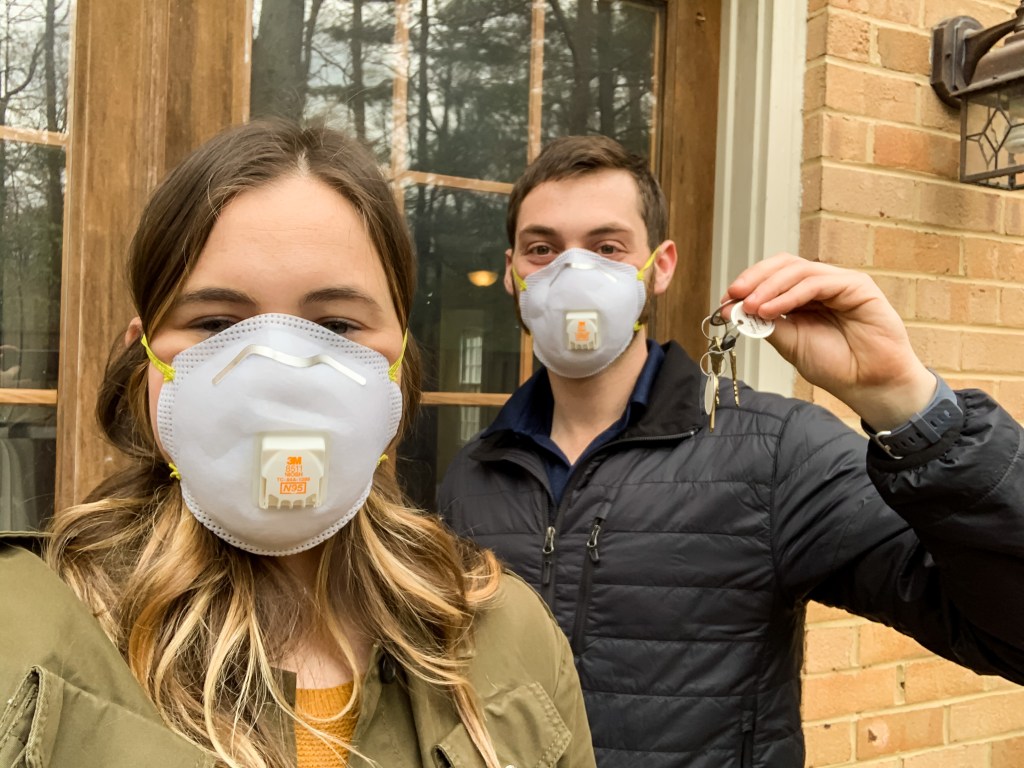
Our realtor is a family friend, which can be really common in an area with a housing market like others, but we know that we’d pick him even if he wasn’t. He has years of experience and sales growth under his belt and an office in the same zip code as our current house, making him the perfect candidate for future home buys in the area. He referred us to our lender, who Andy used for his first home and we used again for our second, and the relationship will only grow from there! 

If it seems like we’re a little crazy about the quality of realtors and lenders, it’s because we are…kind of. The two are going to be your partners in this process and you always want to assemble the best team for the best outcome. That doesn’t mean you can’t find that person on Zillow or consistent “for sale” signs around the neighborhood (connections need to be made somehow!), but make sure you do your research first and find people who are as committed to helping you find a home as you are. If they have the three traits we mentioned above, you’ve found the right people for your home buying experience. 

For our friends in Northern Virginia, we highly recommend Rob Cox Real Estate and Intercoastal Mortgage.

What Happens When You Buy a House in a Global Pandemic

When we made the decision to purchase a fixer-upper in the 2020 spring market, we did not anticipate that our life change would be accompanied by a global pandemic. Upon reflection, it’s hard to explain how everything happened and we’re incredibly grateful that everything worked out in our favor. 

Our home buying process started like any other – we narrowed our search to a few areas with our realtor and we began touring homes that fit our must-have list and budget. We found a home that we loved fairly quickly in late February and put in an offer, but the seller ultimately decided not to sell the home after further consideration. Little did we know that our timeline was going to become urgent in a matter of weeks. 

We toured our current home about a week later. At that point, the pandemic was something that our realtor was talking about as a potential hurdle for his business, but he wasn’t concerned about our ability to make a purchase and close. Although, it was pretty clear at this point that it was going to become serious soon. We made an offer that was accepted the following day and we were set to close on April 1. 

Andy found two old N-95’s that we covered in drywall when we started cleaning out the old house – but it was better than nothing!

In the midst of this, Andy was also selling his first home. His first home was beautifully renovated (more on that to come in later posts!) and we weren’t concerned about it selling quickly, but it was truly a balancing act. The sale wasn’t contingent in technical terms, but we needed the money from the sale to close on our purchase together and, now we had threats of lockdowns and stay at home orders coming soon. 

Andy listed the house a little over a week later and Alexa began working from home that same week. The tours were set to begin the following week, scheduled from Thursday-Saturday and culminating in an open house on Sunday. Andy ultimately decided to cancel the open house for health concerns and we chose to sleep at one of our nearby parent’s houses for the days of the tours to minimize opportunity for us to interact with potential germs. It was a move that might be risky to homeowners in a certain market, but Andy had received multiple offers on his home at that point and we felt comfortable that we would settle on a strong offer without the open house. 

13 offers later, Andy settled on his top two and the home was under contract the following day. We then began the mad scramble to pack up our home and prepare for our transition. This part of the process was pretty traditional, as was our closing with our title company. We wore masks, used hand sanitizer and left the office as quickly as possible – which our facilitator told us was something that he could get used to. Andy’s sale had a potential emergency situation when the female buyer went into labor on her closing day, which was the very last thing we were expecting in the moment that we were living in, but still signed the paperwork to make sure everything was executed on time. You go girl. 

We settled into our new home (or began ripping things apart!) as things in the outside world continued to escalate and even then, we were shocked that we had somehow pulled it off. The experience was a great lesson in learning how to pivot, maintaining a positive attitude and being flexible when life doesn’t want you to be. They’re lessons that everyone has learned over the past year, but they’re helpful in any home buying experience, pandemic or not. You have to be willing to make quick decisions, accept when things don’t go your way and find ways to work around it. With a little faith, you’ll realize that you end up in the right place. 

Also, about 25 days after we closed on the house, we also adopted a rescue puppy named Penny. While we don’t necessarily recommend bringing a new dog into a renovation environment, big changes have a habit of all happening at once and we wouldn’t have had it any other way. 

Our Penny – exploring her new home!

Did you buy a home in the pandemic? What was your experience like? If not, share the craziest part of your home buying stories!

How to Phase Your Home Renovations

It’s tempting to want to fix everything all at once when you move into a new home that could use some attention. We understand why – you want your new home to feel like one and not something that the previous homeowner left behind. No one feels relaxed taking a shower in a bathroom that hasn’t been updated since before they were born or cooking in a kitchen with aging appliances and peeling backsplash. If you’re like us, you also want to have your friends and family over to your new house as soon as possible and you don’t want them feeling unimpressed or commenting about how much work you have ahead of you. 

But, it’s important to phase renovations throughout your home. It keeps you focused on one project at a time, instead of starting a bunch of different projects around the house and then having to decide how and where to divide your time. It could leave some areas unfinished for months, depending on the scope of the project. Renovation phasing also helps you keep an eye on costs in case things get more expensive when planned, which they usually tend to do. 

We’ve used renovation phasing as we worked on our current property and found it incredibly beneficial to maintaining our budget and, more importantly, our sanity. Here’s a few ways to incorporate renovation phasing into your next project:

  1. Identify the areas that need the most attention and where you spend the most time 

Begin your home renovation by determining the home’s most urgent needs first. It might be that before you can redo the kitchen or the main bedroom that you have to replace the roof or the HVAC system. These are critical costly fixes and have to be addressed before making necessary but cosmetic changes. From there, map out which areas of the home are most important to you and where you spend quality time. You’ll want that space to be finished early so you can enjoy it for the longest period of time – whether that’s the backyard, the kitchen or the main bathroom, you and your budget will decide where to start. When in doubt, it’s never a bad idea to start in the bedroom, since it’s an area where you spend most of your time at home (in non-pandemic days anyways!) and where you go to relax.

  1. Create project-free zones throughout your home 

Once you begin a full room renovation in your house, like the kitchen or main bedroom, find a space that you can organize and keep clean for the duration. In a new house, it can be tempting not to fully unpack spaces that you know will be renovated later, but it’s important to create a space where you can step away from the project to relax without the mess and stress. It’s especially critical if you have kids or pets that can’t wander into an unfinished space unattended. Try to space your major projects out by levels if possible – for example, if you’re renovating the kitchen, make your main bedroom a comfortable space to unwind, as opposed to your living room that might be next door and catching some residual dust and temporary storage area. It may not be the perfect space, but know it’s a temporary solution that might motivate you to work faster!

  1. Scale projects appropriately

Renovation phasing also doesn’t mean that you have to go all in on one big project or only start one thing after you’ve finished another. Once you’ve gained more confidence and experience, you can start a few smaller projects at a time and work on the incrementally. For example, we worked on our kitchen backsplash while we also painted the walls, floor and window trim in our main hallway and kitchen. The brick for our backsplash was stored and cut outside, so the weather had to be nice enough to partially work outside to complete that project and we used rainy or colder days to complete inside projects. It also helps when you can have two (or more!) people working on something at the same time! Alexa usually paints while Andy handles anything that involves a saw. We also find that taking a break from a  large lengthy project with a small quick project can help provide some much needed instant satisfaction and a mental break. It’s truly all about balance and committing to getting the project done. 

If you have the resources, you can always close on your new home before closing or moving out of your old one and begin renovations before you even move in. This method, while not attainable for everyone, can be extremely helpful for families who can’t have their children running around an unfinished space or if the home needs immediate updates before you can even move in. However, it’s likely that you’ll have to do some renovation phasing at some point in the project after moving in, so it’s a great exercise to practice when you have competing wants, needs, and budget constraints. 

In our current home, we renovated our main bedroom, bathroom, and closet first because we wanted it to be our safe space where we could rest at night and escape from the rest of our home projects. It also happened that the main bathroom was completely unusable when we purchased the home, so our main space in the home aligned with our main need. As we worked on this project, we did hire a crew to help us install a french drain and regrade our backyard so that we could create an entertaining space for friends while we renovated the main floor later on. We were able to scale our projects appropriately in two different spaces in the house without breaking the budget or feeling like we didn’t have anywhere in the home to go. 

Not complete, but we were functional at this point, which was a huge moment in our journey! No more microwave meals!

Which space would you renovate first? Comment below – we’d love to hear from you! 

The Beginner’s Guide to Searching for Your Next Home

We’ve all been a victim of shopping around for our dream home on Zillow – us included! We draw the lines around our preferred location hoping that something in our price range pops up, or look at the multi-million dollar mansions in another zip code to see how other people live. It’s fun and shows you a bunch of possibilities for the future. A quick sidenote: If you don’t follow @zillowgonewild on Instagram, we highly recommend it, especially if you love seeing the inside of crazy houses like us. 

When it comes time to search for your first or next home though, checking Zillow turns into a full-on treasure hunt and the choices that you enjoyed having when you were idly browsing can become a little daunting. That’s when it’s time to close the app and make a list – one of many you’ll make throughout this process. 

There’s three things that you have to think about when you’re planning on buying your first home: price, location, and must-have features. These are the top three factors that will impact every home purchase you make and determine which properties you consider for purchase. 

It might seem like these are in order of importance – and ultimately price will be the most important factor in your purchase – but it really depends on the buyer. One buyer might be fixated on a certain price range with a reasonable commuting distance to work, while another wants a two-car garage in their dream neighborhood. A location could be a must-have while a must-have could determine location. All of these factors are dependent on one another in the decision making process, so you have to begin by deciding what is most important to you in your next home. 

Here’s a few things to consider in each category as you begin your search: 

  1. Price. Before you consider buying a home, you have to know how much you’re willing to put down on the home and, if applicable, an estimated monthly mortgage payment. Start by determining how much money to have to spend on the home upfront – whether it’s an all cash offer or down payment. If it’s a down payment, you’ll also want to think about what percentage you’ll want to put down. 20% is considered the gold standard, but some states will let you go as low as 3% if you’re a first-time home buyer. From there,  you can approximate a price range that will guide your initial search. Hot tip: You’re going to be able to afford a home that’s more expensive than you thought – stick with your budget and your gut, or you’ll probably end up house poor.  Doing the prep work ahead of time will help you feel confident in what you can afford and where you’re financially comfortable. It is never too early to start talking to a lender to help you form your price range and has the added benefit of getting you pre-approved just in case the perfect home pops up unexpectedly. 
  1. Location. Deciding on a location is such a personal choice. Whether you’re a city, suburb or rural dweller, your location will be the biggest determinant of if you get the price and any of the must-haves you want. You’ll know where you want to live most based on proximity to work, school zones, leisure activities, or other important lifestyle factors. One tip that could help your search is having a few zipcodess or neighborhoods where you’re willing to look, otherwise you could get stuck searching for a needle in a haystack or willing to pay more than you should if you are just waiting around hoping for one of a handful of homes to hit the market.
  1. Must-haves. What are the main features that you need to have in your next home? A backyard for your pets and kids? Multiple guest rooms for out-of-town family? A space for a luxurious bathroom to unwind? Whatever they are, create a list that can help you narrow in on properties to see. It’s important to be reasonable – we’ve all seen that episode of an HGTV where someone wants a laundry list of home features that is not reasonable for their price range. Start by making your list long and then pare it back or number it in order of importance. This will help you visualize your ideal home and help you determine what non-starters are when you’re previewing new listings.

We’ve hinted at this already, but after you narrow in on the main elements of each of these factors, you then need to decide your level of compromise on each one. Are you willing to increase your budget because you found a home in an ideal location or it has one additional feature on your must-have list? Are you willing to get your hands dirty and put in some work to an old kitchen or decaying backyard if that means spending a little less? If you’re willing to do extra work, prioritize having the space to do it as opposed to it being done for you already. 

When we were searching for our current home, Alexa was interested in a city that was never on Andy’s radar, so much so that we weren’t even considering the city and surrounding neighborhoods. But when we weren’t finding anything we liked in other locations after a few weeks, our realtor urged us to look in this spot. Three properties and some aimless driving around later, Andy was hooked. It’s where we live now and want to purchase our next home too, where only 12 months prior our Zillow search circle wasn’t anywhere near. 

You have to know where you’re willing to compromise and your own limits as you search to find the best property for you – and a big part of that is also seeing homes that meet certain aspects of your criteria. You might fall in love with a home that isn’t an open concept or in a neighborhood you hadn’t considered. Come to every showing prepared with your list, but also know where you’re willing to make compromises too. 

With your prepared price, location and must-have list, you’ll be able to set up a meeting with a real estate agent and lender confident in what you’re looking for and what you can afford to spend. A good real estate agent will help you walk through this, but going into your first meeting with them already having most of this worked out will significantly streamline the buying process and help remove some of the uncertainty and stress of early home shopping.

What’s on the top of your must-have list? Comment below and let us know!

Setting Expectations for Quality in a Home Renovation

Whenever we’re outside working on the yard, our neighbors always ask about the progress we’ve made on the renovation, commenting on the saws that have become a staple of our lead walk or what they see us hauling in from the truck each weekend. DIY draws attention and it’s very rewarding! 

Despite having high standards for our own, non-professional work, it is always important to set the right expectation for how the final product will turn out. The flips that you see on HGTV look immaculate because they’re professional and while you can replicate some aspects of that work, it’s likely not going to be the same if you do it yourself.

In any DIY project, it’s important to begin by taking stock of what you feel comfortable and uncomfortable completing yourself. For example, if you’re renovating a bathroom, you probably want to call a plumber to help you with any changes to underground or behind the wall plumbing issues. But, you might be comfortable laying the shower tile and installing the new vanity and sink yourself. 

Do you expect the plumber’s work to be perfect? Yes, especially because you can’t have your shower leaking or flooding and you paid a professional to do professional work. Do you expect your tile and sink to be perfect? No, but if your guests can’t see the pipes under the sink, it might not matter as much. 

Everything you see here – except for materials – is completely DIY!

DIY is a money-saving tactic and you have to decide where you’re willing to save money on quality. This isn’t an excuse for bad or lazy workmanship, but you can’t sweat an imperfect paint job or a slightly uneven tile if you’re doing something on your own. It’s a part of the learning process – and the fun! As mentioned earlier though, you should absolutely expect near perfection and professionalism if you hire a contractor or tradesman to complete a project. You’re investing money in their ability to deliver and that’s what they need to do. 

If you’re newer to DIY, start by completing early projects in areas that might not draw as much attention. If you’re looking to learn drywall repair, start inside a closet where the end result will be blocked by clothes or storage bins. You wouldn’t want to start out with redoing the whole ceiling of your bedroom that you’ll find yourself staring at every morning and night.

When we were in the midst of our kitchen renovation, we found ourselves on the high end of our budget and needed to find places to save. We initially planned to have our island professionally painted, but we decided to paint it ourselves to save on cost. Instead of buying a paint sprayer that a professional likely would have used, we opted for a high-quality paint and primer from Farrow and Ball and a fine roller to get the cleanest finish possible without a sprayer. We knew that with the lighting and layout, there’d be very few angles that would allow you to see some of the small paint imperfections and texture from a roller. 

We decided to paint our kitchen island ourselves, saving a portion of our budget for finishing other parts of the kitchen or if we had an emergency situation later on.

Looking at it now, most people wouldn’t notice the imperfections at all unless they wanted to get under the cabinets with a flashlight. If a professional would’ve given us a 10/10 finish, we pulled off a solid 7/10. For us, doing it ourselves for about $200 and two days of work was much better for our budget than the quote we received for $1200. By choosing to DIY our paint job, we were able to keep our slightly upgraded appliances that we had been looking forward to for months.

As we mentioned in one of our previous posts, your budget will be full of negotiations in order to maximize your vision within your budget. Figuring out where you can or can’t DIY sometimes depends on where you can or can’t compromise on quality. We’d love to think that everything we make is perfect, but it’s far from the truth. We have prioritized stretching our budget through the projects knowing that we might have an occasional out of level tile or bubble in the paint finish, but this is all a part of the DIY process and all a learning experience.

Where have you compromised on quality to save on budget? We’d love to hear your crafty ways of DIY-ing your own spaces to save!

Your First Project: A Budget

Planning a new room renovation or project is such an exciting time. Whether you’re creating plans for a new cozy bedroom or giving your half bath some much needed TLC, the most important step is to align your vision with your budget. This part can make building something new a little less exciting, but definitely more fulfilling. 

Big ideas are fun in the moment, but it can lead to dissatisfaction with the finished project when the budget didn’t support the plan. Thinking within your budget – and let’s be honest, maybe a little over it to prepare yourself – can help you set realistic expectations and keep you on track during a project. It’s not the easiest first step for a home renovator either. Most construction projects come with an automatic “extras” fund because you can’t always plan for everything, but it is important to try. 

The budget process can be exhaustive, mostly because it’s really abstract. If you’re new to home renovation projects, it can be helpful to call in a contractor or two to provide you a quote on a space and get a general idea of what ballpark budget you’ll need. From there, you can also do some online or in-store research on fixtures, materials, and finishes to estimate costs. 

To put it into some perspective, we created a budget for a bathroom remodel to give you an idea of our process. Note, these figures aren’t indicative of a true bathroom renovation, but this should help you outline how you’ll plan a renovation once you have a rough budget. 

Let’s say we want to update a full guest/kids bathroom. We set aside $5,000 for the project, but know that we have an extra cushion of $1,500 that we’re saving for another project later if we need it.

Next, assess what we are working with in the bathroom. The bathtub has seen better years, but still workable and the floor tile can stay with a good scrub. But the rest of the bathroom has got to go.

Once you know what we need, we can move onto the fun part of imagining the space and creating a wish list. We want: 

  • A tile accent wall with built in shelves
  • A new bathtub/shower combo
  • New floor tile
  • A new toilet
  • Convert our single vanity into a double
  • A new mirror
  • A new light fixture
  • A fresh coat of paint

This is the part where you can shape your budget around your needs and your wants. Your direction will be a negotiation – not just with design, but with components of the budget. 

For example, getting a double vanity means we need to bring in a plumber to move pipes behind the wall and a new light fixture means bringing in an electrician. These trade costs, in addition to buying the new vanity and light fixture, can add up. In this case, maybe you decide to keep the workable bathtub and floor tile in order to get the plumber for the double vanity and you get a light fixture that you can install yourself. It’s all about what you want versus what you have the budget to do. 

Here’s two budgets that help break down the bathroom renovation step by step, which can also help you create a timeline of what needs to come first. Realistically, there are dozens of different paths for this scale of project, based on renovator preference and need, but these examples can give you an idea of where to start. 

Option 1

Plumbing/electric/HVAC: $1,000 (3 different contractors needed)

Double vanity materials: $1,750 (cheaper finishes but double the material)

Refresh floor tile and tub: $250

New toilet: $200

Misc accessories: $300

Light fixture(s): $500

Drywall and paint: $500 (do it yourself)

New shower wall tile: $500 (porcelain)

Option 2

Plumbing/electric/HVAC: $250 (DIY)

Single vanity materials: $1050 (nicer cabinet and top)

New tub and floor tile: $1000

New toilet: $200

Misc accessories: $500 (real metal TP holder and robe hook)

Light fixture(s): $250

Drywall and paint: $750 (paying someone to do the work)

New shower tile: $1000 (marble)

In addition to helping you stay financially on track, writing out and walking through your budget can help you visualize where you can gain and lose in order to create your vision. Again, getting a more expensive tile might mean that you need to save on the tub or the light fixtures. Outlining each item with estimated costs can help you move numbers around if something comes in over or under budget during the project. 

You should also anticipate that you likely won’t hit your budget right on target. It can happen (and is always welcome!), but you should always anticipate spending a little more and prepare for any unknowns that could pop up. Pricing out the anticipated route is important, but budgeting or having access to the funds in case things arise is also important for long term success in your DIY life. 

You should also have a backup plan for a worst case scenario – you’re unable to finish a project and you need to call in some help. This is also where getting some of those initial quotes from contractors can come in handy. If you get too deep into the work and can’t finish it, you’ve already had someone come out to estimate the project and know their costs to complete. You always want to have a professional on hand, just in case! 

A budget helps you maximize the execution of your vision, while protecting you from overspending or under delivering. No matter the size of your budget, or the project, your budget is the outline for your project that will evolve overtime, but always remember that it is adaptable as long as you have the funds. Don’t be afraid to move around numbers as the project progresses, or decide to spend more because you saved earlier or vice versa. You don’t necessarily need all your ducks in a row to embark on projects, but starting with even a modest budget outline can help you stay grounded and financially responsible. 

How do you like to budget for renovation projects? We’d love to hear your techniques! 

Getting Started with a DIY Project

Today’s renovation shows have bred the idea that renovating is easy and accessible to everyone. Some projects can be with enough practice, confidence and determination, but knowing how much to take on can be tricky for first time renovators. It is difficult to know the full extent or cost of a project when you are just starting out, even when it’s something small. 

Our backyard was sloping in toward the house and needed to be completely regraded. We removed the brick that covered the back, regraded and installed a french drain to keep water flowing away from the house.

We always take pride in telling people that we did the work on our projects and it is usually followed by a comment about how they wish they had the experience to do it themselves. But to be honest, most of our projects are a first for us too. Whether it’s renovating a kitchen or building an outdoor bench, a lot of it is trial and error the first time – fueled by just enough confidence to set forth on a vision without fully knowing how it’ll turn out. Some things may have to be redone, rethought, reengineered, or recycled into a completely different project, but that’s part of the fun.

Before embarking on one of these projects on your own, there’s a few questions that you need to ask yourself:

  1. Is the time and money put into a project expendable enough that it wouldn’t be the end of the world if it all had to be scrapped half-way through?
  2. Are you mildly confident that the new skill sets learned off of YouTube or blog posts will work eventually?
  3. Is the project very difficult, but worth trying to save money?

If the answer to these three questions is yes, you’re probably ready to give your project a try on your own first! 

After regrading, we laid the brick back down and added pebbles to the side of the yard to make the space more dynamic.

As always, the first place you want to start is with your budget. How much will this project cost you and (hopefully) save in the long run? You can begin this by starting a comprehensive list of materials – maybe overbudgeting a little in case you need to go back to a home improvement store more than once. You’ll also want to estimate how much it may cost if you have to call in a professional to finish the job if it is something essential to the home. You can redo built-in shelves as many times as you want, but if your shower is out of commission for a few days, it’s going to become an emergency situation FAST! 

In addition to compiling a resource material list and budget, it’s also important to develop a timeline on the project, especially if it’s something that might cause an inconvenience to your daily life. Some projects can be done at a leisurely pace in the backyard, basement, or a non-essential room, but others can create a big inconvenience on your day-to-day activities. Creating a timeline for your project will ensure that more essential projects are completed on a reasonable timeline and motivate you to stay on task. 

From there, it’s all about trial and error until you find your way. We lovingly refer to most of our projects as just messing around because that’s usually all it is. A lot of these larger projects are  new to us, requiring new tools and skill sets for each project and not fully knowing what the final product will be. You can start with a picture in your head, but after getting into it, the project might evolve into something else. Not being afraid to get your hands dirty and getting out of your comfort zone is important to any home DIY’er.  Start with smaller projects to build up core skills, like using a drill or getting familiar with saws and work your way up. If you haven’t used a saw before, you probably don’t want to rip up your floors to install hardwood, complete a couple of pieces of furniture or shelves first and work your way up.

Our finished entertaining space in the backyard!

Sweat equity not only makes financial sense, it also builds pride. DIY is incredibly rewarding and something even those with no renovation. experience should try. Start by wading into the shallow section, not diving off the deep end.

What was your first DIY project or what do you want to start with next? We’d love to hear what you’re working on!

Introducing Barefoot Material

Welcome to Barefoot Material! We’re Andy and Alexa and we’re so excited to share our home renovation inspiration and DIY projects with you. 

A little bit on our background. Home renovation is in Andy’s blood with a family full of home builders, custom woodworks and trade specialists. Flipping properties began as a hobby and investment opportunity for Andy after the purchase of his first home in 2018. It’s grown to become a passion for the both of us – a creative outlet to express our love for modern farmhouse style and to make old homes beautiful again. 

We purchased our current home (and our first home together!) in April 2020, just as the pandemic was starting to shut down the United States. We were incredibly lucky to close when we did and, in a way, our projects throughout this home have helped provide us with a sense of purpose and drive in a time where many people have felt confined. Over the past 10 months, we’ve renovated many spaces in our home, including our kitchen, our owners suite, and our yard and we’re looking forward to sharing all the details with you.

Our goal for Barefoot Material is to empower homeowners to create their own dream homes and spaces. We want you to feel confident in taking on any home project – big or small – and will provide tips and guidance from our own experiences within our posts. It will never be perfect, or as easy as you probably expected, but we know that there’s nothing more satisfying than finishing a project that is reflective of your unique vision. 

We’d love to hear from you! Tell us what home projects you’re working on, what you’d like help with, what you like and what you don’t like (we appreciate constructive criticism), and what you want to see us do next. 

See you back here soon!
Andy + Alexa